OpenAI API
Artificial intelligence is steadily making its way into every aspect of our lives, and our classifieds script is no exception. Introducing the OpenAI plugin, built on the globally renowned OpenAI platform, known for creating ChatGPT. The OpenAI plugin enables the integration of artificial intelligence to generate ad descriptions. It uses the basic data provided by users when adding an ad, allowing them to input minimal information about their products while letting the AI expand upon it. This not only saves users time but also opens up more advanced possibilities for marketing and SEO.
How it works
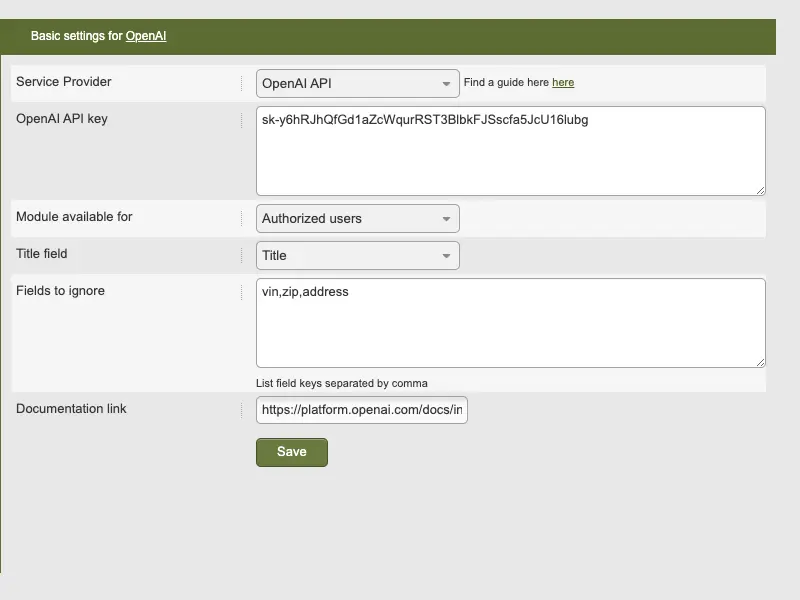
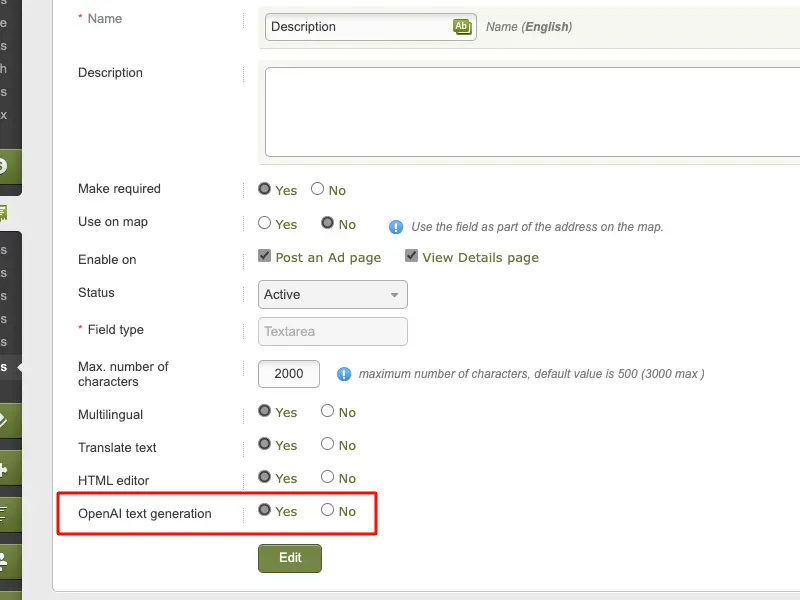
After installation, the Plugin deploys a manager with settings in the admin panel. To enable the Plugin on your site, you need to create an account with OpenAI and obtain an API key. Then, choose the type of users who will have access to the ad generation service. In the final stage of setup, select the title field and define the fields that will be ignored in the generation of descriptions.
Front End
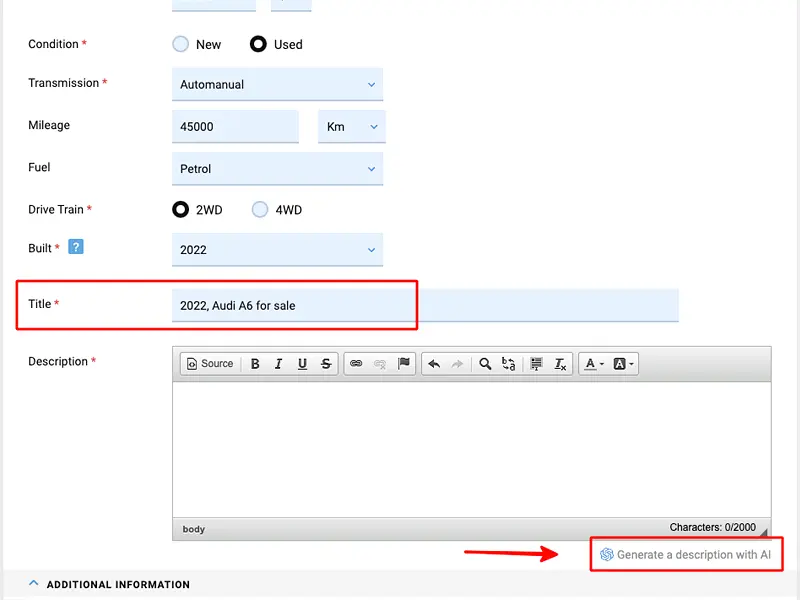
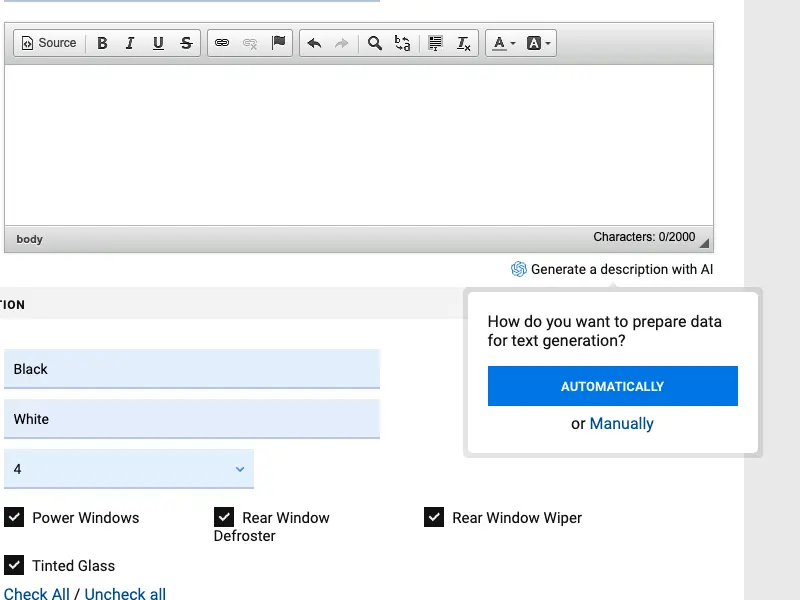
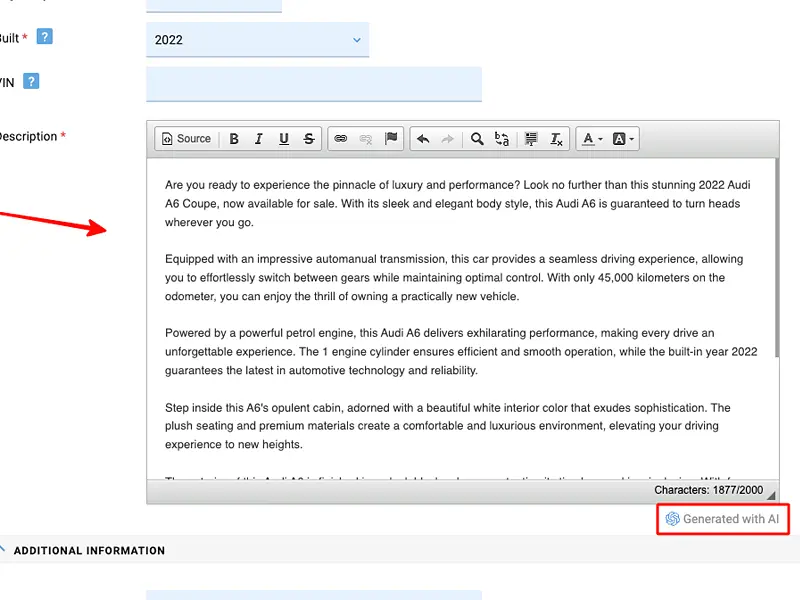
In the user interface, the OpenAI plugin is presented in the form of a link under the Description field - "Generate a description with AI". Clicking the link opens a small pop-up window where you can choose to generate a description automatically or with the ability to control the data sent in the request. In automatic mode, data is sent to the OpenAI server based on preconfigured templates.
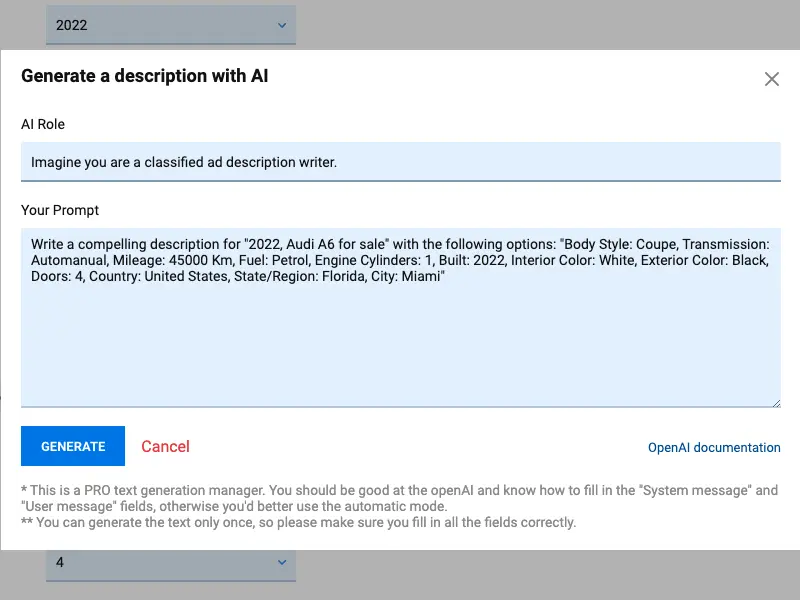
If the user selects the manual data control, a modal window will appear with the following fields:
AI Role
Defines the role assigned to the AI during text generation. If the user is not happy with the default role, he can modify it before sending the data.
Your Prompt
Contains a query generated with the value of the "Title" field and other fields defined by the administrator during the Plugin configuration. The data from other fields is conveyed in the form of "key-value" within the {options} variable. Users also have the option to edit the data in this field as desired.
Once artificial intelligence generates the description, users can edit the generated text or delete it entirely, opting to write their own if they are not satisfied with the result.
Users have a single attempt to generate text for the ad. The generated text is saved to the database of the site. If a user doesn't finish adding his listing or decides to regenerate the text for any reason, he will be offered a previously generated variant from the database.
To explain the principles of working with AI to users in data control mode, we've integrated the option to add a guide for generating queries. This guide appears as a link under the "Your Prompt" field. The administrator can create a guide and add it to the site at the "OpenAI Documentation" link.
Back End
Setting up the Plugin doesn't require advanced skills. All you need to do is to create an OpenAI account and obtain an API key.
Once you have the account and key, you'll need to input them into the site's admin panel and proceed to configure the Plugin.
Given that OpenAI services come with a cost, ranging from 0.02 to 0.10 dollars per request, we've added the ability to choose the types of users to whom the service will be available:
- Visitors and users;
- Registered users;
- Subscription users.
The OpenAI plugin uses the Title field as the primary data source for generating descriptions. As the listing title is constructed with data from various fields selected by the administrator when building a listing title form, it provides the core information for crafting the description text.
Additionally, the Plugin allows you to make a list of fields whose data will be ignored during the generation of ad descriptions. Simply you will need to input the keys of the fields you want to exclude, which will allow you to leave only those fields that will be used for generating descriptions. The Plugin will add the field values to the Your Prompt field and send them in the query in the {options} variable.
For displaying documentation under the modal window you will need to insert a link to the manual in the Documentation link field.
You have to log in to view installation instructions.
- DeepSeek service provider added
- Initial release
No plugin reviews yet.